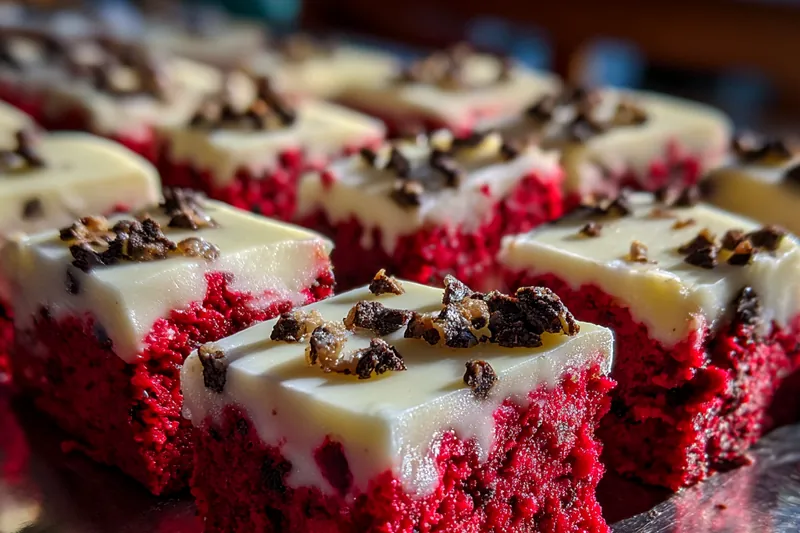
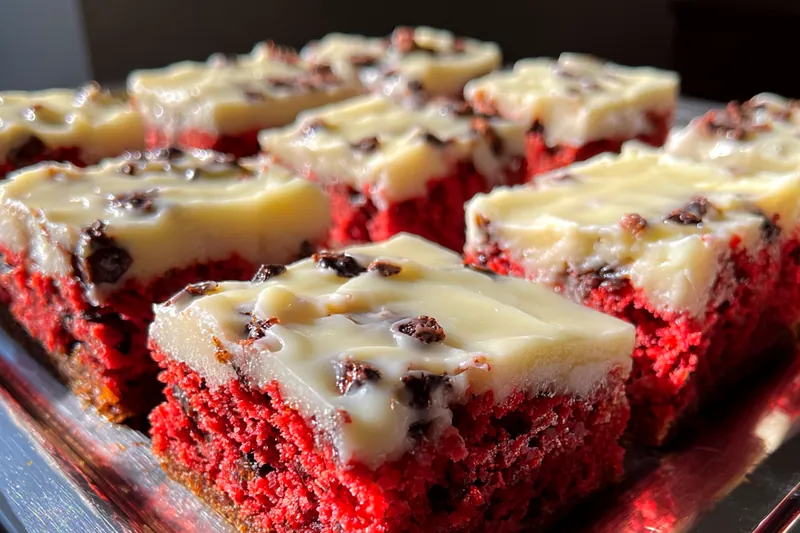
Red Velvet Chocolate Squares
These Red Velvet Chocolate Squares are a delightful twist on a classic dessert. With a rich chocolate flavor and stunning red color, they are perfect for any celebration. Easy to make and even easier to enjoy, they are sure to impress family and friends. The luscious cream cheese frosting adds a perfect finishing touch!


Why This Red Velvet Chocolate Squares Recipe Works
This recipe for Red Velvet Chocolate Squares works because it perfectly balances the rich chocolate flavor with the signature red velvet color. The addition of buttermilk keeps it moist, while the cream cheese frosting complements the flavors beautifully. It's an easy dessert that looks elegant and tastes amazing!
The technique of folding in chocolate chips adds little bursts of chocolate in every bite. Proper mixing of the wet and dry ingredients ensures the squares are tender without being dense. By allowing them to cool before frosting, the cream cheese topping sets perfectly, providing a delightful contrast to the soft squares.
💡 Professional Tip
For the best results, use high-quality cocoa powder for a richer chocolate flavor. Ensure your butter and cream cheese are at room temperature to make mixing easier and achieve a smoother frosting. Don't skip cooling the squares before frosting; it prevents the cream cheese from melting.
Frequently Asked Questions
Yes, you can prepare Red Velvet Chocolate Squares a day in advance. Once baked and cooled, store them in an airtight container to maintain freshness. You can frost them just before serving to keep the frosting looking perfect. This way, you’ll save time on the day of your event.
If you don't have buttermilk, you can make a substitute by adding 1 tablespoon of lemon juice or vinegar to 1 cup of milk. Let it sit for about 5-10 minutes before using. Alternatively, plain yogurt or sour cream can also work well in this recipe for a similar tangy flavor.
To check if the squares are done baking, insert a toothpick into the center. If it comes out clean or with a few moist crumbs, they're ready. Overbaking can lead to dry squares, so keep an eye on them during the last few minutes of baking.
Yes, Red Velvet Chocolate Squares freeze well. Wrap them tightly in plastic wrap and then in aluminum foil or place them in an airtight container. They can be stored in the freezer for up to three months. Thaw them in the refrigerator overnight before serving.
These squares pair wonderfully with a scoop of vanilla ice cream or a dollop of whipped cream. For a touch of elegance, serve them with fresh berries or a drizzle of chocolate sauce. A cup of coffee or a glass of milk also complements this dessert nicely.
In the refrigerator, Red Velvet Chocolate Squares will last for about 3-4 days when stored in an airtight container. Ensure they are completely cooled before refrigerating. If you want them to stay fresh longer, consider freezing them.
Absolutely! You can bake the squares ahead of time and keep them stored without frosting. Decorate them with cream cheese frosting just before serving for the best presentation and taste.
To reheat, place a square in the microwave for about 10-15 seconds until warm. Alternatively, you can warm them in the oven at 350°F (175°C) for a few minutes. Be careful not to overheat, as this can dry them out.
Recipe Troubleshooting Guide
Too Dry
Problem: The Red Velvet Chocolate Squares may have turned out dry.
Solution: To prevent dryness, ensure you do not overbake them. Always check for doneness a few minutes before the suggested baking time. Adding a little more buttermilk can also help keep them moist.
Not Crispy Enough
Problem: The edges of the squares may not be crispy.
Solution: For a crispier edge, bake the squares a few minutes longer, but monitor closely to avoid overbaking. Using a metal baking pan instead of glass can also help achieve that crispy texture.
Overcooked
Problem: If your squares are overcooked, they might be dry or crumbly.
Prevention: To prevent overcooking in the future, reduce the baking time slightly and check for doneness earlier. You can also brush the tops with a simple syrup to add moisture back.
Undercooked Center
Problem: If the center of the squares is undercooked, they may be gooey.
Recovery: Ensure your oven temperature is accurate by using an oven thermometer. If you find the center is undercooked, return the squares to the oven for an additional few minutes until set.
Burnt Exterior
Problem: The tops of the squares might be burnt while the insides are undercooked.
Prevention: To prevent burning the tops, consider covering them with aluminum foil halfway through baking. Adjusting the oven temperature down slightly can also help maintain even cooking.
Flavor Balance
Too Sweet: If the squares are too sweet, consider reducing the sugar in the batter next time or adding a pinch of salt to balance the sweetness.
Too Salty: If they taste too salty, ensure you measure your ingredients accurately, especially the salt, and consider adjusting it in future batches.
Bland: If the flavor is too bland, try adding more vanilla extract or a pinch of cinnamon for added depth.
Essential Ingredients for Red Velvet Chocolate Squares
The key ingredients in this recipe include all-purpose flour, granulated sugar, and cocoa powder. These form the base of the squares, giving them structure and sweetness. The red food coloring is essential for achieving that signature hue, while buttermilk adds moisture and a subtle tang.
Quality ingredients make all the difference in flavor and texture. Use high-quality cocoa powder for a rich chocolate taste. Fresh ingredients, particularly the eggs and dairy, will enhance the overall results of your baking.
Essential Ingredient Notes
- All-Purpose Flour: Using all-purpose flour gives the perfect structure to the squares. Be sure to measure accurately to avoid dry or dense texture.
- Cocoa Powder: Opt for unsweetened cocoa powder to control the sweetness level in your squares. Dutch-processed cocoa can offer a deeper chocolate flavor.
- Cream Cheese: Use full-fat cream cheese for the frosting to ensure it is rich and creamy. Soften it at room temperature for easy mixing.
Step-by-Step Cooking Process
The cooking process begins with preheating the oven and preparing your baking dish. Mixing the dry and wet ingredients separately ensures an even distribution of flavors. It's important to fold in the chocolate chips gently to maintain their shape and bursts of chocolate goodness.
Allowing the squares to cool before frosting is crucial for achieving the best texture and presentation. This step also allows the cream cheese frosting to set properly, creating a delightful contrast between the soft squares and the creamy topping.
Key Technique for Perfect Red Velvet Chocolate Squares
The most important technique in this recipe is the careful mixing of ingredients. Overmixing can lead to a dense texture, while under-mixing can cause inconsistent cooking. By gently combining the ingredients until just mixed, you ensure a light and fluffy result.
Red Velvet Chocolate Squares
📋 Ingredients
Main Ingredients
- 1 cup butterRoom temperature
- 2 cups powdered sugarSifted
- 1/4 cup milkAdjust as needed
For the Sauce
- 2 cups all-purpose flourFor the base
- 1 cup granulated sugarFor sweetness
- 1/2 cup unsweetened cocoa powderFor chocolate flavor
- 1 tsp baking sodaFor leavening
- 1 tsp saltFor flavor
- 1 cup vegetable oilFor moisture
- 1 cup buttermilkFor richness
- 2 large eggsFor binding
- 2 tbsp red food coloringTo achieve color
- 1 tsp vanilla extractFor flavor
- 1 tsp white vinegarTo react with baking soda
- 1/2 cup chocolate chipsTo add chocolate chunks
Instructions
Preheat Oven
Preheat your oven to 350°F (175°C) and grease a baking dish.
Mix Dry Ingredients
In a bowl, whisk together the flour, sugar, cocoa powder, baking soda, and salt.
Combine Wet Ingredients
In another bowl, combine the oil, buttermilk, eggs, food coloring, vanilla extract, and vinegar.
Combine Mixtures
Gradually add the dry mixture to the wet mixture and mix until just combined.
Add Chocolate Chips
Fold in the chocolate chips gently to the batter.
Pour Batter
Pour the batter into the prepared baking dish and smooth the top.
Bake
Bake in the preheated oven for 30-35 minutes or until a toothpick comes out clean.
Prepare Frosting
In a bowl, beat the cream cheese until smooth, then gradually add powdered sugar and milk until desired consistency.
Cool and Frost
Allow the squares to cool completely before spreading the cream cheese frosting on top.
Recipe Notes & Tips
Storage Tips
To store your Red Velvet Chocolate Squares, place them in an airtight container at room temperature for up to 3 days. For longer storage, refrigerate them. If you need to freeze them, wrap each square individually in plastic wrap before placing them in a freezer-safe container.
Serving Suggestions
Red Velvet Chocolate Squares can be served as a standalone dessert or paired with a scoop of vanilla ice cream. Garnish with fresh berries or a sprinkle of powdered sugar for added presentation. A drizzle of chocolate sauce enhances the chocolate flavor beautifully.
Recipe Variations
For a fun twist, consider adding nuts or white chocolate chips to the batter. You can also experiment with different frostings, such as a chocolate ganache or whipped cream cheese frosting. For a gluten-free version, substitute all-purpose flour with a gluten-free blend.