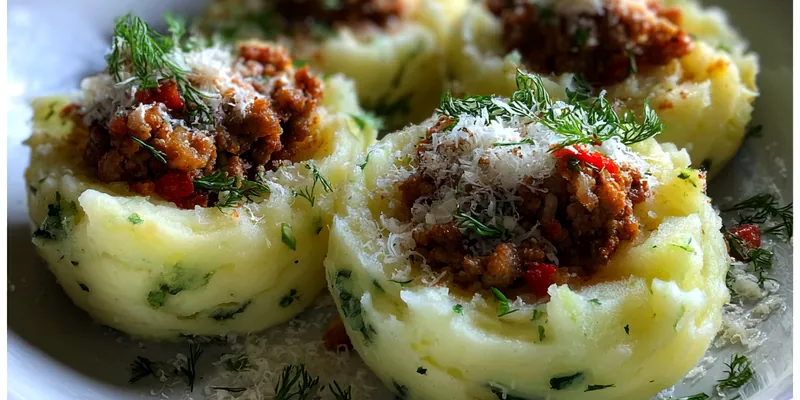
Herb Stuffed Potato Nests
Herb Stuffed Potato Nests bring a unique twist to traditional potato dishes. It's a delightful Mediterranean-inspired recipe that combines crispy potato nests with flavorful herb filling. This dish is perfect for a family dinner or a gathering with friends, offering both comfort and taste in every bite.

Why This Herb Stuffed Potato Nests Recipe Works
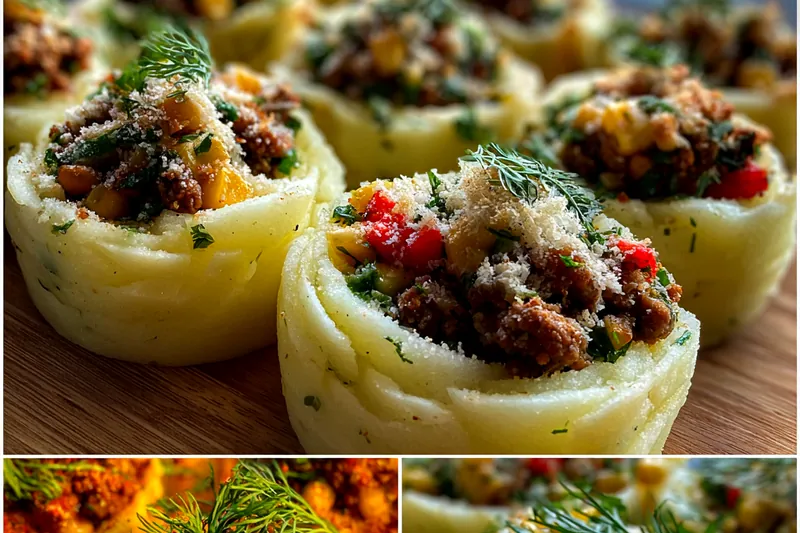
This recipe works beautifully because it combines the crispiness of potato nests with a rich, cheesy herb filling. The contrast of textures makes each bite delightful. Plus, it's a great way to use up any leftover potatoes and fresh herbs you have on hand.
The technique of pressing the potato mixture into muffin tins ensures even cooking and a perfect nest shape. The nests become wonderfully golden and crispy while the filling stays creamy and flavorful, creating a perfect harmony of taste and texture.
💡 Professional Tip
For the best results, make sure to squeeze out any excess moisture from the grated potatoes. This will help achieve a crispier nest. Additionally, feel free to customize the herb filling with your favorites for a unique twist.
Frequently Asked Questions
Yes, you can prepare the potato nests in advance and fill them with the herb mixture just before baking. This is a great time-saver for dinner parties, allowing you to enjoy more time with your guests.
If you prefer a dairy-free option, you can substitute the cheese with nutritional yeast or a dairy-free cheese alternative. This will still provide a savory flavor while accommodating dietary preferences.
The nests are done when they are golden brown on the outside and the filling is bubbly. You can also insert a toothpick into the center; if it comes out clean, your nests are ready.
Yes, you can freeze the potato nests before filling them. Just bake them until golden, then allow them to cool before wrapping them tightly in plastic wrap. They can be stored in the freezer for up to a month.
These nests pair beautifully with a fresh salad or steamed vegetables for a balanced meal. You can also serve them with a yogurt dip or tzatziki sauce for added flavor.
They can be stored in the refrigerator for up to 3 days in an airtight container. Reheat them gently in the oven or microwave before serving.
Absolutely! You can prepare the nests in advance and store them in the fridge. Just bake them fresh right before serving for the best texture.
The best way to reheat them is in the oven at 350°F (175°C) for about 10-15 minutes until heated through. This will help retain the crispiness of the nests.
Recipe Troubleshooting Guide
Too Dry
Problem: If the nests are dry after baking, it may be due to overbaking or using too much potato without enough binding ingredients.
Solution: To fix this, ensure you monitor the baking time closely and adjust the ratios of your ingredients if needed, especially the eggs and cheese which help retain moisture.
Not Crispy Enough
Problem: Nests may not be crispy if the potato mixture is too wet or if the oven temperature is not high enough.
Solution: Make sure to squeeze out excess moisture from the potatoes and maintain the oven temperature at 400°F (200°C) for optimal crispiness.
Overcooked
Problem: If the nests are overcooked, they may become too hard or burnt.
Prevention: To prevent this, keep an eye on the nests towards the end of the baking time and do a toothpick test to check for doneness.
Undercooked Center
Problem: The center of the nests may be undercooked if they are too thick or if the baking time is insufficient.
Recovery: If this happens, return them to the oven for a few more minutes and check regularly until they are cooked through.
Burnt Exterior
Problem: Burnt exteriors may occur if the oven temperature is too high or if they are left in the oven for too long.
Prevention: Lower the baking temperature slightly and monitor closely to avoid burning the outer layers while ensuring the inside cooks properly.
Flavor Balance
Too Sweet: If the nests are too sweet, add a pinch of salt or more herbs to balance the flavors.
Too Salty: If they're too salty, consider adding a bit more grated potato to dilute the saltiness.
Bland: For bland nests, increase the amount of herbs and seasoning to enhance the flavor profile.
Essential Ingredients for Herb Stuffed Potato Nests
The key ingredients in this recipe are fresh potatoes, which form the crispy nests, and a variety of herbs that infuse the filling with vibrant flavor. Using high-quality cheese adds richness and a creamy texture that complements the herbs beautifully.
To achieve the best results, opt for fresh herbs whenever possible. They enhance the flavor profile and offer a beautiful aroma. Quality cheese, such as feta or mozzarella, will elevate the dish and ensure a delightful eating experience.
Essential Ingredient Notes
- Potatoes: Choose starchy potatoes, like Russets, for the best textures in your nests. They hold together well and become crispy when baked.
- Fresh Herbs: Utilize a mix of fresh herbs such as parsley, dill, and green onions. This combination brings freshness and depth of flavor to your nests.
- Cheese: Opt for a cheese that melts well, like mozzarella or a tangy feta. This will create a creamy filling that perfectly contrasts the crispy exterior.

Step-by-Step Cooking Process
This recipe involves a straightforward method of preparing the potato nests and filling them with a flavorful herb mixture. The process is easy enough for novice cooks while still allowing experienced chefs to showcase their skills.
By following the steps carefully, you can ensure that your nests will be both crispy on the outside and deliciously filled on the inside. The key is to balance the moisture content of the potato mixture while ensuring even baking.
Key Technique for Perfect Herb Stuffed Potato Nests
The most important technique is to properly squeeze out excess moisture from the grated potatoes. This step ensures that your nests become golden and crispy instead of soggy. Pressing the potato mixture into the muffin tin firmly also helps create a well-formed nest.
Herb Stuffed Potato Nests
📋 Ingredients
Main Ingredients
- 1 cup butterRoom temperature
- 1 tablespoon lemon juiceFreshly squeezed
- 1 teaspoon garlic powderFor flavor
- 1/2 teaspoon saltTo taste
For the Sauce
- 2 lbs potatoesPeeled and grated
- 1 cup grated cheeseFeta or mozzarella
- 1/4 cup fresh parsleyChopped
- 1/4 cup fresh dillChopped
- 1/4 cup green onionsChopped
- 2 eggsBeaten
- 2 cloves garlicMinced
- 1 teaspoon saltTo season
Instructions
Prepare Ingredients
Gather all your ingredients and preheat the oven to 400°F (200°C).
Mix Potato Mixture
In a large bowl, mix the grated potatoes, beaten eggs, garlic, salt, and paprika until combined.
Create Nests
Grease a muffin tin and press the potato mixture into each cup to form nests.
Bake First Time
Bake the nests for 25-30 minutes until golden and crispy.
Prepare Filling
Mix the cheese, herbs, and sour cream in a bowl.
Fill Nests
After the nests are baked, fill them with the herb mixture.
Final Bake
Return to the oven for another 10-15 minutes until the cheese is melted.
Serve and Enjoy
Let cool slightly before serving. Serve warm and enjoy!
Recipe Notes & Tips
Storage Tips
Store any leftover Herb Stuffed Potato Nests in an airtight container in the refrigerator. They can last up to three days. For best results, reheat them in the oven to maintain their crispiness.
Serving Suggestions
These nests are perfect as a side dish or main vegetarian meal. Serve them alongside a fresh green salad for a complete meal or pair them with a yogurt sauce for extra flavor.
Recipe Variations
Feel free to experiment with different fillings! Try adding roasted vegetables, different types of cheese, or even cooked meats to create a heartier version of these nests.