Cheesy Stuffed Mashed Potato Nests
Step into a world of comfort with our Cheesy Stuffed Mashed Potato Nests! These delightful creations transform humble mashed potatoes into an impressive dish, featuring crispy, golden-brown potato shells cradling a creamy, melted cheese filling. Perfect for family dinners, holiday gatherings, or simply when you crave something utterly delicious and satisfying. Easy to make and universally loved, these nests are sure to become a new favorite in your recipe repertoire.

Why This Cheesy Stuffed Mashed Potato Nests Recipe Works
This recipe for Cheesy Stuffed Mashed Potato Nests isn't just another potato dish; it's a culinary experience. It works so well because it combines familiar, comforting flavors with an exciting presentation. The contrast between the slightly crispy, golden mashed potato exterior and the warm, gooey, cheesy filling creates an irresistible texture and flavor profile that will have everyone reaching for seconds. It's a fantastic way to elevate a simple side dish into a main event.
The key to its success lies in two main techniques: first, perfecting the mashed potato base with an egg for structure and a touch of Parmesan for flavor, ensuring it holds its nest shape beautifully. Second, the carefully balanced cheese filling, combining the tang of cream cheese with the sharp richness of cheddar, makes every bite a burst of deliciousness. The baking process brings out a lovely crispness on the potato edges, making them wonderfully satisfying.
💡 Professional Tip
For perfectly smooth, lump-free mashed potatoes, always start with cold water when boiling your potatoes. This allows them to cook more evenly from the outside in. After draining, return the potatoes to the hot pot for a minute or two to steam off excess moisture before mashing. This prevents a watery consistency and ensures your nests hold their shape better.
Frequently Asked Questions
Yes, you can! Prepare the mashed potato nests and fill them as instructed, but do not bake. Cover loosely with plastic wrap and refrigerate for up to 24 hours. When ready to bake, remove from the fridge for 30 minutes to come closer to room temperature, then bake as directed, potentially adding an extra 5-10 minutes to the cooking time to ensure they are heated through.
While Russet potatoes are ideal for their fluffy texture, you can substitute them with Yukon Gold potatoes. Yukon Golds will yield a creamier, slightly denser nest. Avoid waxy potatoes like red or new potatoes, as they tend to become gummy when mashed and won't hold their shape as well for the nests.
Your Cheesy Stuffed Mashed Potato Nests are done when the potato edges are golden brown and slightly crispy, and the cheese filling in the center is bubbly and melted. If you want a deeper golden color, you can place them under the broiler for 1-2 minutes, watching carefully to prevent burning.
Yes, you can freeze them! After forming and filling the nests (before baking), place them on a baking sheet and freeze until solid. Once frozen, transfer them to a freezer-safe bag or container for up to 2-3 months. To cook, bake from frozen at 375°F (190°C) for 40-50 minutes, or until heated through and golden.
These nests are versatile! They make a fantastic side dish for roasted chicken, grilled steak, or baked ham. For a complete vegetarian meal, pair them with a fresh green salad or some steamed vegetables like asparagus or green beans. A dollop of sour cream or a sprinkle of extra chives on top is also a lovely addition.
Leftover Cheesy Stuffed Mashed Potato Nests can be stored in an airtight container in the refrigerator for up to 3-4 days. For best results when reheating, use an oven or air fryer to help maintain their crispy texture.
Absolutely! The mashed potato mixture can be made a day ahead and stored in the fridge. Form and fill the nests just before baking for the best texture. If you assemble them completely ahead of time, allow them to sit at room temperature for about 30 minutes before baking to ensure even cooking.
To reheat, place the nests on a baking sheet in a preheated oven at 350°F (175°C) for 15-20 minutes, or until heated through and the edges are crispy again. An air fryer also works wonderfully at 350°F (175°C) for 8-10 minutes for a quick crisp up.
Recipe Troubleshooting Guide
Too Dry
Problem: Mashed potatoes are dry and crumbly, making it hard to form nests or resulting in a tough texture.
Solution: Ensure you don't overcook the potatoes, which can dry them out. Add a little more warm milk or a tablespoon of sour cream/cream cheese to the mashed potato mixture until it reaches a smooth, pliable consistency. Don't be afraid to adjust based on potato type.
Not Crispy Enough
Problem: The potato nests lack that desired golden-brown, crispy exterior after baking.
Solution: Make sure your oven is fully preheated to 400°F (200°C). Ensure the nests are spaced out on the baking sheet for proper air circulation. For extra crispness, a light brush of melted butter or olive oil on the potato exterior before baking can help. You can also broil for the last 1-2 minutes, watching carefully.
Overcooked
Problem: The potato nests become hard or burnt on the edges, while the filling might dry out.
Prevention: Prevent overcooking by setting a timer and checking for doneness around the 25-minute mark. If edges are browning too quickly, you can loosely tent with foil. Ensure your oven temperature is accurate; an oven thermometer can be very helpful.
Undercooked Center
Problem: The potato exterior is done, but the cheesy filling isn't fully melted or warm.
Recovery: This often happens if the ingredients were too cold when they went into the oven. Ensure cream cheese and shredded cheddar are at room temperature. If the exterior is golden but the filling isn't bubbly, cover the nests loosely with foil and continue baking for another 5-10 minutes to allow the center to heat through.
Burnt Exterior
Problem: The outside of the potato nests is too dark or burnt before the inside is perfectly cooked.
Prevention: If your oven runs hot, reduce the temperature by 25°F (15°C). You can also cover the nests with aluminum foil after the first 15-20 minutes of baking to prevent further browning while the interior finishes cooking. Ensure the nests are not too thin on the edges.
Flavor Balance
Too Sweet: This recipe is savory; sweetness is not a common issue. If accidentally too sweet, a pinch of salt and a dash of hot sauce can help balance the flavors.
Too Salty: If too salty, it's likely from adding too much salt during potato boiling or mashing. To fix, you can mix in a small amount of unsalted mashed potato (if available) or serve with a dollop of unsalted sour cream to counteract the saltiness.
Bland: If the nests taste bland, you likely need more seasoning. Next time, be more generous with salt, pepper, garlic powder, and onion powder in the potato mixture. A pinch of smoked paprika or a dash of Worcestershire sauce in the filling can also add depth.
Essential Ingredients for Cheesy Stuffed Mashed Potato Nests
The heart of these delectable potato nests lies in a selection of fresh, high-quality ingredients. Russet potatoes are crucial for their fluffy texture, providing the perfect canvas for mashing and forming. The combination of butter and whole milk creates a rich, creamy base, while an egg acts as a binder, ensuring the nests hold their shape beautifully during baking. Don't skimp on the seasonings; garlic and onion powder provide a foundational savory flavor that enhances every bite.
For the glorious 'stuffed' component, a dynamic duo of cream cheese and sharp cheddar cheese is non-negotiable. Cream cheese provides an irresistible tang and silky smoothness, perfectly complemented by the robust, nutty notes of sharp cheddar. Fresh green onions add a welcome piquant freshness and a pop of color, cutting through the richness. And for those who enjoy an extra layer of savory depth, crispy bacon bits are an optional but highly recommended addition that truly elevates the experience.
Essential Ingredient Notes
- Potatoes: Choose starchy potatoes like Russets for the best results. Their high starch content breaks down beautifully, creating a light and fluffy mash that holds its shape well when baked. Avoid waxy potatoes, as they tend to become gummy.
- Cheese Blend: For the filling, always use block cheese and shred it yourself instead of pre-shredded. Pre-shredded cheese often contains anti-caking agents that can prevent it from melting as smoothly, giving you a creamier, more luxurious filling.
- Milk & Butter: Ensure your milk is warm and butter is softened when adding to the mashed potatoes. Cold dairy can seize the starches in the potatoes, leading to a gluey texture. Warm ingredients absorb better, yielding a much smoother and creamier mash.
Step-by-Step Cooking Process
Creating these Cheesy Stuffed Mashed Potato Nests is a straightforward process that yields incredibly rewarding results. It begins with perfectly boiled and mashed potatoes, seasoned to perfection and fortified with an egg for structure. The key is to achieve a mash that is smooth enough to pipe or scoop, yet firm enough to hold its nest shape without collapsing. This foundation is critical for the success of the dish, ensuring a delightful texture in every bite.
Once the potato nests are formed on the baking sheet, the focus shifts to crafting the luscious cheesy filling. A simple combination of softened cream cheese, sharp cheddar, and aromatic green onions is mixed until wonderfully creamy. Spooning this filling into the potato hollows transforms them into inviting pockets of flavor. The final bake in a hot oven not only crisps the potato exterior to a beautiful golden brown but also melts the cheese filling into a bubbly, irresistible goo that makes this dish truly special.
Key Technique for Perfect Cheesy Stuffed Mashed Potato Nests
The most crucial technique is ensuring your mashed potato mixture has the right consistency. It needs to be firm enough to hold its shape when formed into a nest, but still creamy and smooth. Adding a beaten egg to the warm mashed potatoes acts as a binder, providing structural integrity. If the mash is too loose, add a tablespoon or two of flour or cornstarch. If too stiff, a splash of warm milk will soften it. Practice forming a test nest before doing them all.
Cheesy Stuffed Mashed Potato Nests
📋 Ingredients
Potato Nest Base
- 8 oz cream cheesesoftened
- 1 cup shredded sharp cheddar cheesefreshly shredded preferred
- 1/4 cup chopped green onionswhite and green parts
- 1/4 cup cooked bacon bitsoptional, for extra flavor
- 2 tbsp fresh parsleychopped, for garnish
Stuffed Filling
- 2.5 lbs Russet potatoespeeled and quartered
- 1/2 cup unsalted buttersoftened
- 1/2 cup whole milkwarm
- 1 large eggbeaten
- 1/4 cup grated Parmesan cheesefor flavor and crispness
- 1 tsp garlic powder
- 1/2 tsp onion powder
- Salt and freshly ground black pepperto taste
Instructions
Prepare Mashed Potatoes
Place peeled and quartered potatoes in a large pot. Cover with cold salted water and bring to a boil. Cook for 15-20 minutes, or until fork-tender. Drain well and return potatoes to the hot pot.
Mash and Season Potatoes
Add softened butter, warm milk, garlic powder, onion powder, salt, and pepper to the drained potatoes. Mash until smooth and creamy. Stir in the beaten egg and Parmesan cheese until well combined. Set aside to cool slightly.
Preheat Oven and Prepare Baking Sheet
Preheat your oven to 400°F (200°C). Line a large baking sheet with parchment paper or spray with non-stick cooking spray.
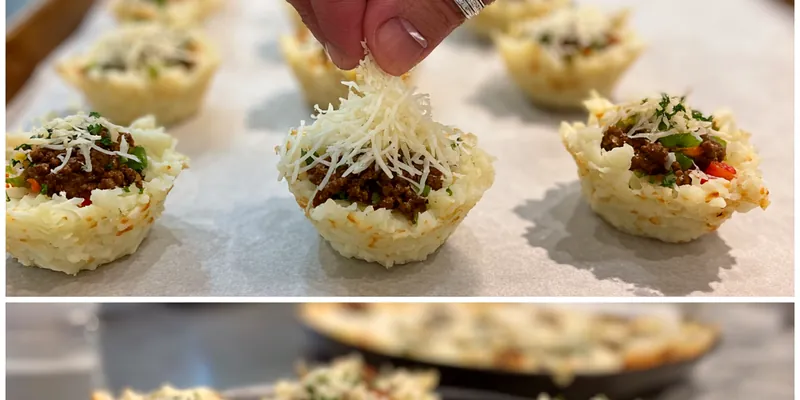
Form Potato Nests
Scoop about 1/2 cup of mashed potato mixture per nest onto the prepared baking sheet. Using the back of a spoon, create an indentation in the center of each potato mound, forming a nest shape. Ensure the edges are slightly higher to hold the filling.
Prepare Cheesy Filling
In a medium bowl, combine softened cream cheese, shredded cheddar cheese, chopped green onions, and bacon bits (if using). Mix until thoroughly combined.
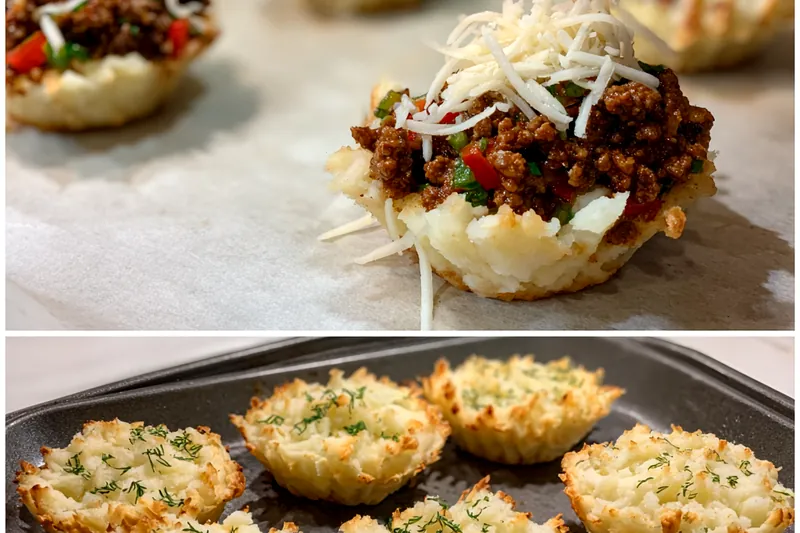
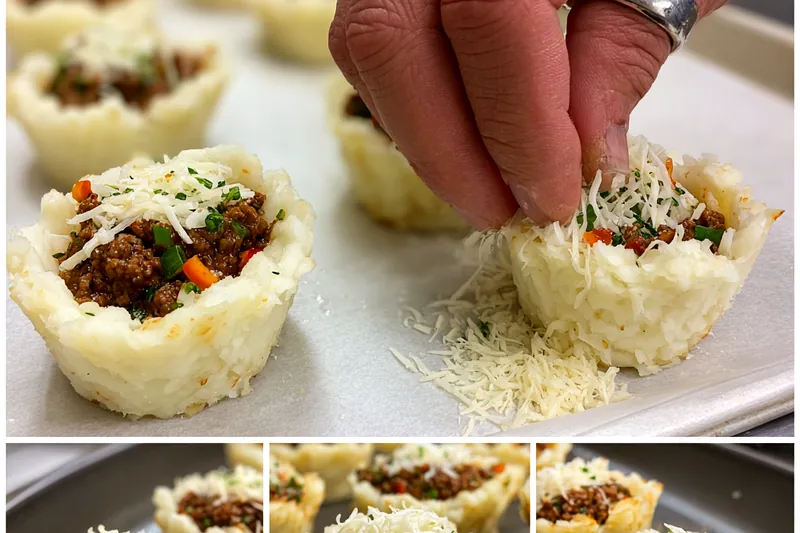
Fill the Nests
Spoon a generous amount of the cheesy filling into the center of each potato nest. You can gently press it down to ensure it's nestled securely.
Bake the Nests
Bake in the preheated oven for 25-30 minutes, or until the potato nests are golden brown and crispy on the edges, and the cheese filling is bubbly and melted.
Serve and Garnish
Carefully remove the potato nests from the oven. Let them cool for a few minutes before serving. Garnish with fresh chopped parsley, if desired. Serve warm as a delightful side or light main course.
Recipe Notes & Tips
Storage Tips
Store any leftover Cheesy Stuffed Mashed Potato Nests in an airtight container in the refrigerator for up to 3-4 days. To maintain crispness, it's best to reheat them in an oven or air fryer rather than a microwave. This helps to re-crisp the potato edges.
Serving Suggestions
These nests are incredibly versatile. Serve them as an elegant side dish with roasted meats like turkey, chicken, or beef. They can also be a standalone vegetarian main course when paired with a fresh green salad or some steamed seasonal vegetables for a balanced meal. A dollop of sour cream on top before serving adds a lovely finish.
Recipe Variations
Feel free to customize the filling! Try adding finely diced ham, cooked spinach (squeezed dry), or roasted red peppers for different flavor profiles. For an extra kick, a pinch of cayenne pepper or a dash of hot sauce can be added to the cheese mixture. You can also experiment with different cheese blends, like Monterey Jack or Gruyere.