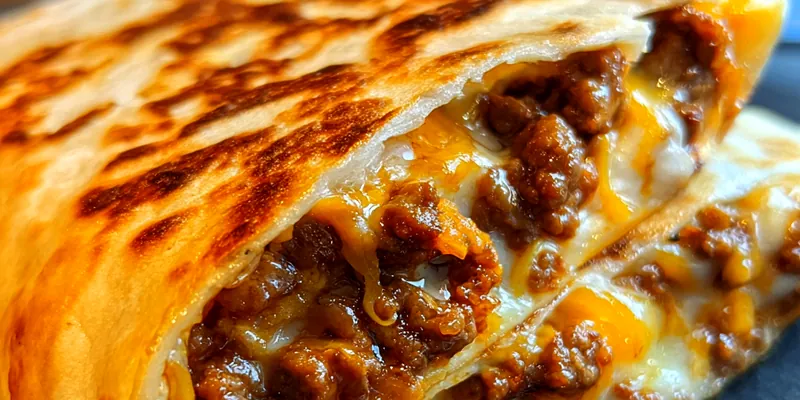
Cheesy Grilled Beef Wrap
The Cheesy Grilled Beef Wrap is a delightful fusion of flavors that brings the warmth of Mexican cuisine to your lunch table. With its cheesy goodness and tender beef, this wrap is both satisfying and easy to make. Perfect for a quick meal on busy days or a delicious treat for family and friends. Enjoy a taste of Mexico with every bite!

Why This Cheesy Grilled Beef Wrap Recipe Works
This recipe stands out due to its balance of flavors and textures. The seasoned beef is perfectly complemented by gooey cheese and fresh vegetables, making each bite a burst of taste. Additionally, the use of tortillas keeps the wrap light yet filling, making it a fantastic lunch option.
Grilling the wraps adds a delightful crunch that enhances the overall experience. The melting cheese binds the ingredients together, ensuring that every bite is as satisfying as the last. With simple techniques, anyone can achieve professional results at home.
💡 Professional Tip
To ensure your Cheesy Grilled Beef Wrap is perfectly crispy, preheat your grill or skillet before adding the wraps. Additionally, a light brush of oil on the outside will help achieve that golden crust. Don’t overload the wraps to keep them easy to handle and grill evenly.
Frequently Asked Questions
Yes, you can prepare the beef mixture and assemble the wraps ahead of time. Just store them in the refrigerator until you're ready to grill. However, for the best texture, grill them just before serving.
You can use ground turkey or chicken as a lighter alternative. Alternatively, for a vegetarian option, try using black beans or lentils mixed with your favorite vegetables and spices.
The wraps are done when they are golden brown on the outside and the cheese is melted and gooey inside. You can also check that the beef is cooked thoroughly by ensuring it reaches an internal temperature of 160°F.
Yes, these wraps can be frozen! Just wrap them tightly in foil or plastic wrap and store them in an airtight container. To reheat, bake in the oven at 350°F until heated through.
These wraps pair wonderfully with sides like Mexican rice, refried beans, or a fresh salad. You can also serve them with salsa, guacamole, or sour cream for dipping.
When stored properly in an airtight container, these wraps will last about 3-4 days in the refrigerator. Just reheat them in a skillet or microwave before serving.
Yes, you can assemble the wraps in advance and keep them refrigerated until you are ready to grill. This makes it convenient for meal prep or entertaining guests.
The best way to reheat these wraps is by placing them in a skillet over medium heat. This will help maintain their crispy texture while warming the filling. Alternatively, use a microwave, but be aware that they may become softer.
Recipe Troubleshooting Guide
Too Dry
Problem: If your wraps turn out dry, it may be due to overcooking the beef or not adding enough cheese.
Solution: To fix this, ensure you monitor the cooking time and add extra cheese or a drizzle of sauce to keep the wraps moist.
Not Crispy Enough
Problem: Wraps that are not crispy can result from cooking at too low a temperature.
Solution: Increase the heat slightly and make sure to preheat your skillet or grill before adding the wraps for a crispier exterior.
Overcooked
Problem: Overcooking can lead to tough and dry wraps.
Prevention: Keep a close eye on the grilling process and remove them from the heat once they are golden and the cheese is melted.
Undercooked Center
Problem: If the center of the wrap remains cold or the beef is undercooked, it may not have been grilled long enough.
Recovery: Return the wraps to the heat and cover them to allow the center to warm through without burning the exterior.
Burnt Exterior
Problem: If the exterior is burnt but the inside is undercooked, it could be due to cooking at too high a temperature.
Prevention: Lower the heat and cook them more slowly to ensure even cooking throughout the wrap.
Flavor Balance
Too Sweet: If the wrap is too sweet, add a dash of lime juice or more spices to balance the flavors.
Too Salty: To reduce saltiness, add more unsalted ingredients, like sour cream or fresh veggies.
Bland: If the wrap is bland, enhance the flavor with additional taco seasoning or a splash of hot sauce.
Essential Ingredients for Cheesy Grilled Beef Wrap
The key ingredients in this Cheesy Grilled Beef Wrap are fresh ground beef, two types of cheese, and a variety of colorful vegetables. These elements come together to create a delicious flavor combination. The beef is seasoned perfectly, while the cheese provides a creamy texture that balances the dish.
It's important to use high-quality ingredients for the best flavor. Fresh vegetables and good-quality cheeses will elevate the wrap. Consider using organic or locally sourced products when available for a fresher taste.
Essential Ingredient Notes
- Ground Beef: Choose lean ground beef to reduce fat content while still enjoying a juicy flavor. Ground sirloin is a great option for a leaner choice that retains moisture.
- Cheddar Cheese: Use freshly shredded cheddar cheese for the best meltability and flavor. Pre-packaged shredded cheese often contains anti-caking agents that can affect melting.
- Tortillas: Opt for larger flour tortillas as they are more pliable and can hold more filling. For a healthier option, try whole wheat or corn tortillas.
Step-by-Step Cooking Process
Making the Cheesy Grilled Beef Wrap is straightforward and enjoyable. Begin by cooking the beef and vegetables together, allowing the flavors to meld. Assembling the wraps is a fun part of the process; you can customize the ingredients according to your preference.
Grilling the wraps requires attention to ensure they are golden brown and crispy. The key is to monitor the heat and turn them carefully to avoid any burning while ensuring the cheese melts perfectly.
Key Technique for Perfect Cheesy Grilled Beef Wrap
The key to a perfect Cheesy Grilled Beef Wrap lies in the grilling technique. Preheating your grill or skillet to the right temperature ensures a crispy exterior while keeping the filling warm and melty. Don't rush the grilling process; take your time to achieve that golden crust and delicious melted cheese inside.
Cheesy Grilled Beef Wrap
📋 Ingredients
Main Ingredients
- 1 cup butterRoom temperature
- 1/2 cup mayonnaiseFor creaminess
- 2 tbsp lime juiceFor tanginess
- 1 tbsp hot sauceFor spice
- 1 tsp garlic powderFor flavor
For the Sauce
- 1 lb ground beefLean ground beef
- 1 cup shredded cheddar cheeseFor a cheesy flavor
- 1 cup shredded mozzarella cheeseFor extra creaminess
- 1/2 cup diced tomatoesFor freshness
- 1/4 cup chopped onionsFor flavor
- 1/2 cup bell peppers, slicedFor crunch
- 4 large flour tortillasFor wrapping
- 1/4 cup sour creamFor creaminess
- 1 tbsp taco seasoningFor flavor
- 1 tbsp olive oilFor cooking
Instructions
Cook the Beef
In a skillet over medium heat, add olive oil and ground beef. Cook until browned, breaking it apart with a spatula. Drain excess fat.
Add Vegetables
Add diced tomatoes, onions, bell peppers, and taco seasoning to the cooked beef. Stir well and cook for an additional 5 minutes.
Prepare Tortillas
Warm the tortillas in a dry skillet for about 30 seconds on each side to make them pliable.
Assemble the Wraps
On each tortilla, spread a layer of sour cream, followed by the beef mixture, and sprinkle with cheddar and mozzarella cheeses.
Fold and Grill
Fold in the sides of the tortilla and roll up tightly. Place seam-side down on a grill or skillet over medium heat.
Grill the Wraps
Grill the wraps for about 2-3 minutes on each side, or until golden brown and cheese is melted.
Slice and Serve
Remove from heat, slice in half, and serve hot with lime wedges, guacamole, and extra cilantro.
Enjoy!
Dig into your delicious Cheesy Grilled Beef Wraps and enjoy the flavors of Mexico!
Recipe Notes & Tips
Storage Tips
To store Cheesy Grilled Beef Wraps, allow them to cool completely, then wrap them in plastic wrap or store in an airtight container. They can last up to 4 days in the fridge. For longer storage, consider freezing them.
Serving Suggestions
These wraps can be served with a side of tortilla chips and salsa, or a simple salad to balance out the richness. You can also add extra toppings like avocado slices or fresh pico de gallo for added flavor.
Recipe Variations
For a different twist, try adding cooked beans, or substituting the beef with grilled chicken or shrimp. You can also experiment with different cheeses for unique flavors.